Friday, April 30, 2010

Deep Rock

200mm at f/10

Lightroom offers some awesome features for managing and organizing your photographic work. I imagine it's less ideal for managing snapshots from your vacations or parties, but it's great when you use it for organizing your "portfolio" of artistic work.

Lately, the number of photos I have sitting around waiting to be processed has gotten out of control. I've also been perusing some older photo shoots and finding some hidden gems. All of this has lead me to put some thought towards finding a way to keep track of all these photos that I'd like to "eventually process".

One of the tools available in Lightroom is the ability to apply a color label to each of your photos. I've decided to label all of my "published" photos (that is, photos I've uploaded and shared) blue, and to label all of my photos that I think merit some future attention yellow. I can then easily filter my entire library for yellow photos, and when I feel in the mood, I can pick one or two to process and share.

I mentioned I've found some older photos that looked promising. I think what happened with these is that there was some creativity in the composition, but the light, color, contrast, or whatever didn't work out and they didn't look that great straight off the camera. Now that I'm more confident in my editing skills, though, I can play some tricks to highlight the good elements of these images and make use of them.

Also, the more I learn about design and composition, the more interested I've become in the photos where the composition is more of the focus than the actual material--basically, I've started to have a greater appreciation for my more abstract images.

The image at the top of this post is of a rock in the San Francisco Bay. It was taken in 2006 from the Golden Gate bridge with a long zoom lens. I like the perspective--I think the overhead view makes me feel like I'm hovering above it about to fall into the bay [shudder].

It was middday and the rock was pretty harshly lit, and it's also covered in bird poop and dead grass. Overall, the face of the rock was just a distracting mess. I used a Lightroom preset here called "Cold Tone", which I think had a great effect in creating a simpler, almost monochromatic image with a mysterious vibe.

Friday, April 23, 2010

Sensor Dust

Scenic photography seems to be plagued by sensor dust. It shows up most visibly against skies and clouds and when the lens is set to a small aperture, which it often is when you're shooting a landscape and want a large depth of field.

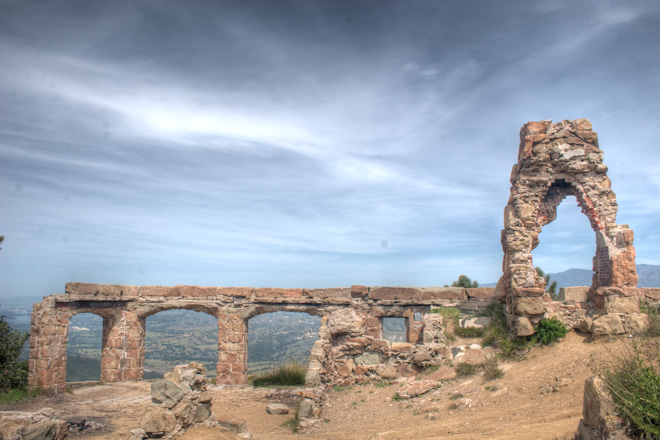
Take a look at this photo from my last post. This is the output straight from the HDR step. The HDR process "enhances detail" and so it tends to worsen these dust spots.


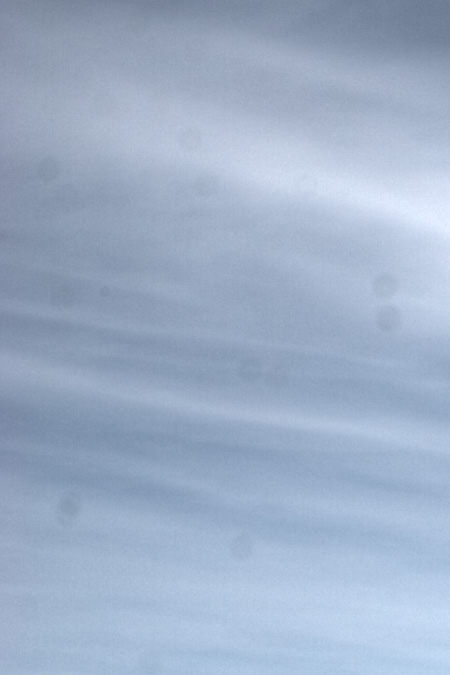
Here's a zoomed-in look at an especially bad part of the sky. Yuck!


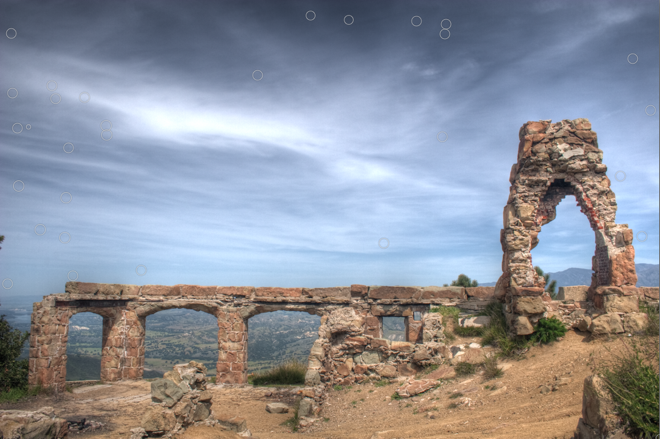
It's not the end of the world, though. Even basic editors like Picasa have tools for removing dust spots. So the next step for me is to go in and heal all of these nasty little spots. Sometimes they can be tough to spot; I find that it helps to drag the photo around--your eye seems to notice them better when the picture moves.

Here's a screenshot from Lightroom showing all the places I had to remove dust. What a pain!


So what do you do about it? Well, many of you probably have newer camera bodies which have some automatic sensor cleaning and "dust-delete" technology built in. Our 20D does not, though, so I just constantly gripe about it and say to myself all the time "man, I really need to clean my sensor sometime!".

I'm finally getting around to cleaning it, and I thought I'd share the experience with you as well as record some notes for myself for future cleanings.

For starters, cleaning your sensor sucks. It's difficult, scary, and not very cheap. I haven't been perfectly happy with my results, either. The first time I did it, a little fiber managed to make its way into some part of the viewfinder and I haven't been able to get it out. So, with that cheery outlook...

Test shot
The first step is to take a test shot that clearly shows all of the dust on your sensor. Do this with a long focal length (I used our 50mm f/1.8 lens), the lowest ISO (100 for me), and the smallest possible aperture. Focus at infinity and take a picture of a blue sky or an evenly-lit, light colored wall. With these settings, it will probably be a really long exposure, but don't worry about it. Motion blur doesn't affect the dust particles on the sensor, and could even help by blurring out any unwanted detail in the wall.

Here's my initial test shot of a cream-colored wall.



You can zoom in on this photo and spot the dust. To really highlight the dust, though, bring the photo into Photoshop or the GIMP.

Go to Image->Levels Adjustment and adjust the levels to create some crazy contrast. Bring the black and white sliders all the way into the edges of the histogram, like so:
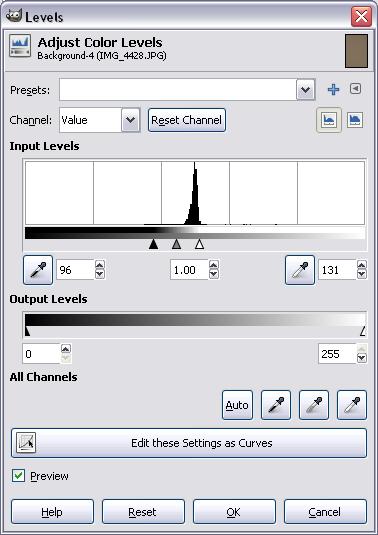


This should get you a crazy looking photo that really accentuates the grossness. The color can be distracting, so at this point I turn it to grayscale. Here's the same test shot with those adjustments:
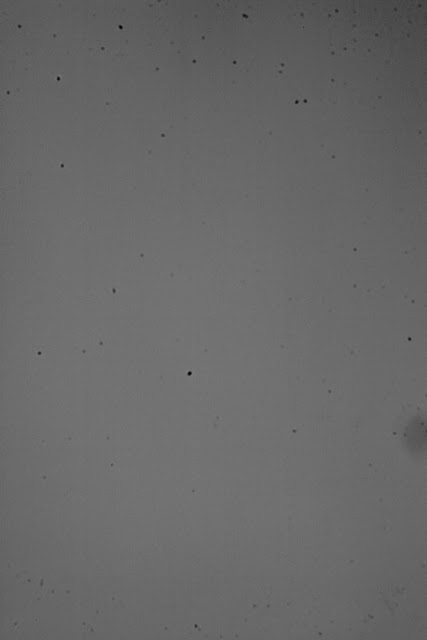


Now you have a baseline and you can try different cleaning techniques and see how much they improved things.

Cleaning the sensor
I find that anyone who says anything online about cleaning a camera sensor always adds a scary disclaimer to avoid any liability. So here's mine: do not treat this post as instructions for cleaning your sensor. If it reads like instructions, it's because I'm writing them to myself for cleaning my sensor, not for you to clean yours.

First off, you need an environment to work in that's as dust free as possible. I've read suggestions to use a tiled bathroom or kitchen with the windows closed.

Our home was built in 1928 and the weatherproofing is hopeless. The first time I cleaned my sensor, I did it in our bathroom, and I literally watched a few dust particles fall into the camera body. This time around, I did it in my cube at work at the end of the day--definitely a pretty sterile environment, provided I cleaned off part of my desk.

You'll need a tripod to hold the camera while you work.


There are a variety of methods for actually cleaning your sensor. There are two that I've been using: a blower and sensor swabs.

I start with the blower. I use the tripod to point the camera at an angle downward to encourage dust to fall out and discourage dust from falling in. Your camera should have a function for locking the mirror up and out of the way so that you can get to the sensor. Mine is labeled "Sensor clean." and is one of the very last menu options. On the 20D, this locks up the mirror until you power off the camera.

The first step, then, is to lock the mirror up and use a few forceful blasts of air to try and blow dust off the sensor. I did this and took another test shot; here's the before and after comparison.


It's hard to tell with the small images side by side, but this did make a difference. Still pretty bad overall, though.

The next step is the sensor swabs. At this point, unfortunately, I don't really remember the research that went into choosing a brand of swabs and cleaner. If I remember correctly, I picked both the blower and the swabs up from a local camera store because they weren't any cheaper online. Also, I went with an off-brand sensor swab.

Using the swabs has never gone that well for me. The instructions are to apply the solution to the swab, then wipe in one direction across the sensor, then the other direction using the opposite side of the swab. I think this means that you should only have to put the swab in and out of the camera once, since you're basically wiping one way then wiping back the other.

I find the edges of the sensor to be the hardest part. After swabbing and taking a test shot, I ended up with what looked like some moisture residue along one edge of the sensor, plus a fairly large fiber. I decided to go in for a second swab, and it didn't get much better. I got rid of the fiber, but a couple large spots showed up in the middle, and the residue was still there along the edge.
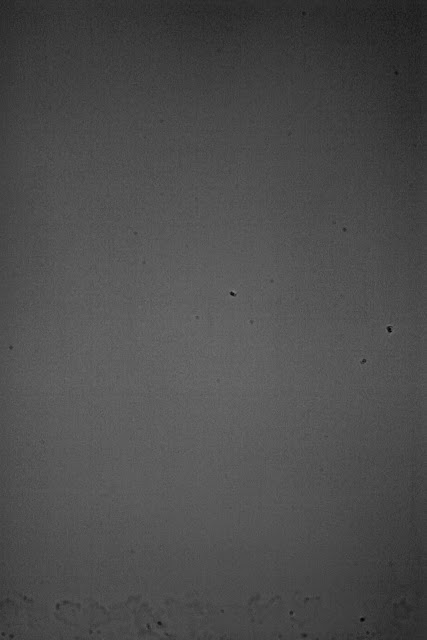


Unfortunately that's pretty much where I left it. I tried a few more blasts of air but no luck. I've done a little more reading since then and found some other techniques to try. There's a relatively cheap "sensor pen" that looks promising. I have such a tough time with the swabs and the edges; the pen seems like it would be a lot easier to use.

In the meantime, I guess I'll just keep doing spot removal when I process the images!

There are a lot of articles out there on sensor cleaning, so I'd suggest reading up before you try it. Here's one that I read this time around which had some helpful tips.

Good luck!

Saturday, April 17, 2010

Knapp's Castle

6-exposure HDR of Knapp's Castle

After a hard week at work, I was craving a little outdoor adventure. This morning, Jess and Logan and I drove up to a set of ruins called Knapp's Castle at the top of the hills behind Santa Barbara. It turned out to be a great place to take the family-- the ruins were only a half mile from the trailhead. And what a great spot for photography!

I created this image by merging 6 exposures to HDR in Photomatix. I had 11 to work with, but the most underexposed ones didn't have any valuable detail in them, so I just used the brightest six.

The output of the HDR had a pretty "grungy" sky which looked cool but was too crazy to be believable. I took one of the original exposures and tweaked it a bunch to get a good dramatic sky, then brought them both into Photoshop and blended them together.

The HDR output

One of the original exposures, edited to enhance the sky

The original sky exposure, pre-crop

Some random thoughts and lessons that may be helpful:
  • I used a circular polarizer on my lens for these shots. This proved to be really helpful--it was one of those days where the clouds were high and almost more like haze than clouds. The polarizer really helps there to add good contrast to the sky, bringing out deeper blues and cutting through some of the reflection from the haze.
  • I've been frustrated recently with the stability of my cheap ($30?) tripod. I'm planning to replace it with a really nice one soon, but I learned a good tip recently that helped here. Whenever possible, don't extend the center column of your tripod. The closer the camera is to the ground, the more stable it will be. That wasn't very ideal here, where I really wanted to be looking down at the ruins, but I think it did make it more steady. Either way, I can't wait for my new tripod :)
  • If you compare the above images, you may notice that I removed some distracting trees from around the arch of the chimney. I did this with the clone-stamp tool in Photoshop. I use the spot healing tool in Lightroom a lot, but had never used this tool. It worked great for this job--spot healing is good for removing things like sensor dust, but when you need to remove something larger and odd-shaped, the clone-stamp tool can do it. You alt-click to tell it where to sample from, then paint over the area you want to remove, and it does a nice job blending for you.
Have a great weekend!

Friday, April 9, 2010

The Curves Tool

200mm, 1/1250sec. at f/8.0

Curves is a powerful but complicated tool that is available in more advanced photo editing software like Photoshop or the GIMP. It deserves a thorough, well illustrated, and well thought-out explanation, so I'm not going to aspire to do that here. What I do want to do, though, is bring it to your attention and show you how it helped me greatly enhance this recent photograph. Then, I'll point you to some well written tutorials where you can learn about it in more detail.

I'm going to oversimplify things a bit and say that curves is a tool for adding contrast to your images, as well as controlling the relative brightness or darkness of different parts of your image.

Here's what the tool looks like in Photoshop. Understanding the real meaning of this graph is valuable, but it's a hard place to start--it's easier to start with a more superficial but practical understanding.


In the curves tool dialog, you can click and hold anywhere along the line, and drag up or down to add a gentle bend to that part of the line, creating a "curve". The simplest application of this tool is to create a slight "S" curve which will add some nice contrast to your image.

(The curves screenshots in the rest of this post are from Lightroom, which is where I normally use the tool.)


Hehe, that's a great photo. Jess took it; you can read about it here if you're interested.

This basic contrast is great, but curves may be overkill for just adding a little contrast to your image. A simpler photo editor will usually have a contrast slider which may be just as effective and easier to use.

Curves becomes a much more exciting tool when you think of it as a way to control the brightness of different tonal ranges in your image.

In my morning outing to Hendry's Beach that I posted about a few weeks ago, I took the photo at the beginning of this post. I'm almost always shooting wide-angle at the beach, but this was a moment where I was glad to have a 55-200mm zoom lens in my bag.

Take a look at these before-and-after images, showing the original image and the tone curve that I applied.


Using the curves tool, I essentially told it, "make just the 'light' part of the clouds a lot lighter, and make the 'dark' areas a little darker". This creates a much more dramatic and higher contrast image.

Both Lightroom and Photoshop also provide a great intuitive tool for working with curves. It allows you to click anywhere on the image, and adjust the part of the curve which corresponds to the point in the image where you clicked.

I'm tempted to try and explain the curves tool more, but I know I won't have time to do it justice. If you're serious about editing, you should look into curves. Take a look at these great tutorials, and I'll do my best to answer any questions you leave in the comments.

I have to admit I haven't fully read through this one, but it appears to be very thorough and well illustrated, and I'm looking forward to reading it and maybe picking up a few new things. It goes to show just how much background is required in understanding this tool.
http://www.chromasia.com/tutorials/online/curves/

This one is from one of my favorite sites for tutorials, cambridgeincolour.com. It's a little shorter and more to the point, but also more technical. You may be able to get going quickly with this one without completely understanding it, then re-read it over time and gradually build your understanding.
http://www.cambridgeincolour.com/tutorials/photoshop-curves.htm

Friday, April 2, 2010

End of a day

50mm at f/8.0, 8 exposures merged to HDR in Photomatix

Jess and Logan and I went for a walk last weekend along Cabrillo Boulevard, the road which runs along the coast in front of downtown Santa Barbara. I liked the light shining through these palm trees, and I had been itching to try making an HDR image using more than 3 exposures. So I set up my tripod and made Jess and Logan plop down on the grass to add some interest to the scene. Keeping Logan "posed", of course, meant holding him down and tickling him :).

This is an HDR image composed of 8 exposures, and for once, it's not super noisy! At first I chalked that up to the 8 exposures as opposed to 3, but I tried processing it with just 3 of the 8 images and that wasn't noisy, either. There may just be something unique about the lighting of this scene that made it less noise-prone than my other attempts. Either way, I'm happy to not be complaining about noise!

Here are all 8 exposures laid out. They range from -3 1/3 stops to +3 1/3 stops, but they're not evenly distributed within that range.


Figuring out how to take all of these exposures quickly was an interesting challenge. I used a combination of the camera's auto-bracketing feature and exposure bias. I set the auto-bracketing to take 3 exposures at -1 1/3, 0, and +1 1/3 stops. I then used the exposure bias to take three bracketed shots each at -2, 0, and +2 stops. For those of you keeping count, that's a total of 9 images--I must have misplaced one or something.

An interesting part of this process is that it takes some time to take all of those exposures, and subjects can easily move in that time (especially when one of the subjects is a toddler!). This movement results in "ghosting" in the final image. Here's what Jess and Logan looked like straight out of the HDR process.


Those faint lines come from their changing positions in the different exposures.

To fix this, I picked one of the exposures where Jess and Logan were exposed well and looked best. I happened to pick the 6th exposure. I made a little effort to adjust this image so that it at least somewhat matched the HDR image in terms of exposure and color.

I then brought this exposure plus the HDR image into Photoshop, auto-aligned the two images, and then used a layer mask and a brush to replace the ghosted version of Jess and Logan with the one from the good exposure. If you look closely, I didn't do a very stellar blending job there; hopefully my technique will improve over time.

Sadly, I don't think there's anything to be done about the huge streak of lens flare on Jess' back, but what can you expect when you shoot straight into the sun?!

This was a lot of fun, and had me all giddy to try this "many-exposure-HDR" technique on some other subjects. As I'm writing this, I've already had a chance to apply this technique on a recent sunrise at the beach, and I'm excited to share the results with you when I'm finished :).

Happy Easter Weekend!