Thursday, July 30, 2009

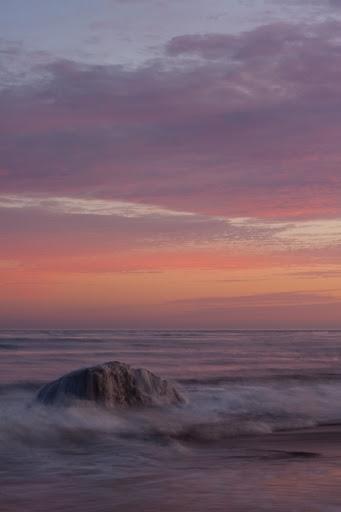
Sunset at Hendry's Beach

50mm, 1.3 sec at f/22, ISO 200

Just a few days after I spent the morning at Butterfly beach (the subject of my last post), I noticed some beautiful clouds in the sky towards the evening, which could make for a great sunset.

I had obviously already put a lot of energy into photography that week, and felt like I might have had my fill of adventure. I checked the tides anyway, and they were a perfect height for the rocks at Hendry's Beach (about 3ft).

Our house is great for "monitoring" the sunset. Out the front windows we have a great view of the mountains, and you can see how the clouds are looking there. Out our back porch, you can see where the sun goes down, and how the clouds are looking over the ocean.

Still undecided, I kept running back and forth across the house checking the clouds every 5 minutes (this has pretty much become a daily habit). Finally, I couldn't take it anymore, so I got permission to leave my loving wife with the baby, grabbed my gear, and headed to the beach.

After I got back that night, I was convinced I would never pass up another sunset again.
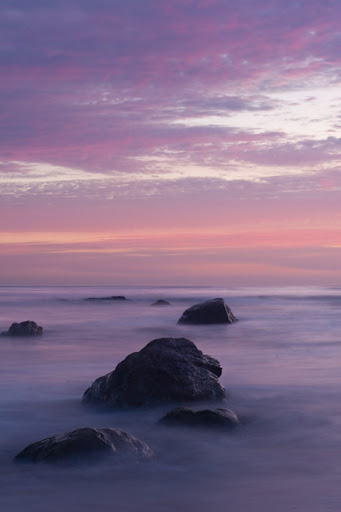
50mm, 6.0 sec at f/22, ISO 100

I hadn't yet had a chance to look over and process my photos from Butterfly, so I hadn't learned all of the lessons from that shoot yet. I had learned, though, to make sure that in my photos the water actually went past the rocks. In a lot of my photos from Butterfly, the water didn't even reach the rocks.

I was a little more careful with my compositions this time around, but it was still pretty frantic. I'd look one way in the sky and say, "wow, look at that!", take a few pictures, then look behind me and say, "oh my gosh, look at that!"
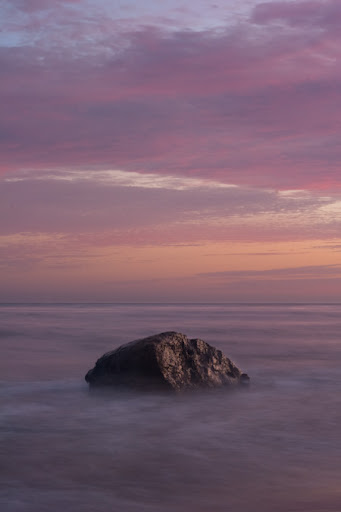
50mm, 5.0 sec at f/22, ISO 100

Looking over the photos, there are definitely a good number that make me wonder what I was thinking when I took them--the compositions are so bad I must have just been trying to fire off shots to capture some cool bit of light in the clouds. But, there were clearly a few that turned out great.

Overall, it was an amazing sunset and I had a lot fun.

18mm, 15.0 sec at f/22, ISO 100

Some thoughts from this outing:
  • I came prepared with some shorts and rubber flip-flops; in most of these photos, the waves went up past my feet and left seaweed wrapped around the legs of the tripod.
  • I put polarizing filters on the lenses I used. I'm not sure how significant the polarizing effect is in the evening, but the filters protected the lenses and hopefully cut some of the light to allow for longer exposures.
  • In composing these seascapes, you have to consider the shape of the clouds! Capturing the colors and the movement of the water is one thing, but taking the shape of the clouds into account makes this tough. Most of the photos just captured a segment of the clouds and their color, but cut off the edges. It would be really great to capture more of the cloud formation and tie it in to the rest of the composition.
Jess and I are taking next week off and I'm sure we'll be doing a lot of photography, so hopefully there will be some exciting stuff coming up!

Wednesday, July 22, 2009

Butterfly Beach

A few weeks ago, I got up at the lovely hour of 5 am and drove down to Butterfly Beach in Montecito to catch the sunrise.

I always check the tides online before going to the beach, and this was the lowest I had ever seen it. I was kind of afraid that when I got there the ocean would be gone and I would be able to see all the way to the bottom.

Sure enough, "the ocean was gone", and there were some beautiful rocks exposed down by the waves.


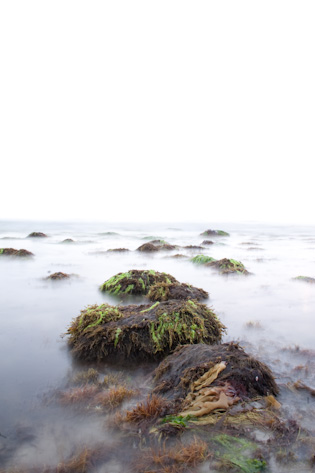
To smooth out the waves, I made the exposure as long as possible. I set the aperture to the lens' minimum of f/22, and I set the ISO to the minimum of 100. This got me up to a 5 second exposure. The above photo, though, was actually overexposed and taken with a 20 second exposure.

While photographing these rocks, I knew the scene had a big range from dark to light, so I decided to bracket my exposures in case I wanted to try blending the different exposures. I bracketed the shot at -2, 0, and +2 stops. As it turned out, the +2 stop image (20 second exposure) looked the best. The water in the 0 stop image (5 second exposure) was pretty smooth, but it didn't have the same eerie atmosphere that this one has.

Are you ready to see the before and after? Because I don't think you are... :)


Where'd the color come from, right? First, I brought the whole image down 1 stop in Lightroom because it all looked over-exposed. Then, I added a graduated filter over almost the whole image to bring down the sky by another two stops. This brought out the clouds which were hiding in there, but they were still pretty white-washed. So I added a blue tone to the filter, and that's where the color came from. I think it works well because, if you compare it to some other properly exposed photos from the morning, the sky color is actually a pretty close match, though maybe just a bit more surreal.

I also played some with the -2 stop image, since it captured the colors in the sunrise. It's probably not a serviceable image because of the obliterated foreground, but I liked the sky and the reflection too much not to share it.


The moon crept in there at the edge of the shot. The moon was blown away in the +2 image, but you can actually still see its reflection in the water if you look closely.

After editing the -2 stop exposure, I was stoked, because I was thinking that I'd just blend this image together with the +2 exposure and get the best of both worlds. I've read a few other photographers mention blending in different exposures to get the perfect "seascape" shot, so I figured I was golden. It didn't work out at all, though. That sky is just far too dark for how light the foreground is in the other one, and there was just no way to believably blend the two together. I'm really glad I tried the blue tone in the +2 image, otherwise I probably would have just given up on the whole shot.


This was my first attempt at using rocks as a foreground, so I definitely didn't have a clear idea of what I was doing. I pretty much spent the whole time running around experimenting--I wasn't focused on finding and composing a perfect shot. A few photos still turned out really cool, though, and I definitely learned a lot in the process.

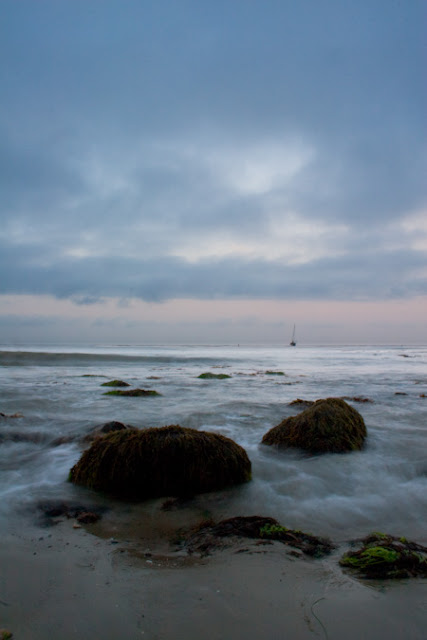
I was amazed at how that 20 second exposure turned out, but the below photo is really more what I was envisioning that morning.


This photo was taken with a 1/2 second exposure, and I love the way it captured the movement in the water. The photo as a whole isn't too great, though. The wave on the horizon is distracting, and the original image was badly underexposed, so the final edit has a lot of noise in the foreground.

The next time I go out, I think I'll try taking more photos around this shutter speed. I should also be able to adjust the aperture and ISO to overexpose it a bit and bring out the foreground better.

One last photo from the morning before I leave you.


Thanks for stopping by!

Wednesday, July 8, 2009

Photo Editing

A really important lesson about photo editing for me has been not to worry about it too much. Sure, if you spend more time tweaking the settings you might find a better look, but it's not worth it. This is especially true when you're still learning how to edit your photos, and don't feel confident with the tools.

The key is to remember that this is not the last photograph you'll ever take, and you're in the learning process. There will be other, better photos down the line, and you'll have more experience editing, so it will go quicker and you'll get better results.

If instead you put too much expectation on one photo, you'll stress yourself out trying to make it perfect. I find that if I spend too much time on a photo, I start to get less and less clear about what looks good and what doesn't. My instinct for the photo starts to fade. Worse, I get discouraged and may never finish it, which means all that effort was completely wasted.

Often I find myself looking at a photo that could benefit from some complicated edits. It's important to stop here, though, and ask yourself, is this photo worth the effort? Most often it's not. And if the photo isn't amazing, it's going to be all the harder to stay motivated as you pain-stakingly edit it. So if the photo isn't great to begin with, you should probably just move on.

The only exception to this that I'd make is that it's good to get practice, so if the photo is halfway decent, maybe it's worth going overboard on it just for the experience.

Friday, July 3, 2009

Laguna Beach

For our four-year wedding anniversary, Jess and I left Logan with his grandma and went down to Laguna Beach for the weekend. We had a fun time overall, though we were pretty bummed that it was cloudy and drizzling all day Saturday.

The clouds did make for a great sunset, though.


I couldn't find anything interesting to put in the foreground for this shot, so I kind of gave up on the composition.

All of the best beach sunset photos seem to have a rock or some tide pools in the foreground. It makes sense--you need something in the foreground to give the photo depth, and what are you going to find on the beach except some rocks or maybe some driftwood?

Anyway, the colors were stunning enough that I thought I'd share the photo regardless.

There were also some interesting edits involved here. Check out the before and after.


When you expose for the sunset, the foreground is going to be too dark. Looking at some stunning beach sunset photos on flickr, you can tell that they always bring up the foreground.

Lightroom makes this really easy with its graduated filter tool. In the below screenshot, the filter is the three lines running across the horizon. In the pallete on the right, I can specify what adjustment(s) I want applied across this filter. For this shot, I increased the exposure by 1.33 stops to brighten both the beach and the waves.


You can also do this, of course, in Photoshop or the GIMP. Take a look at my Digital ND filter post for an example.

I boosted the contrast a bit, and brought up the darks as well.

For the saturation, I actually boosted just the oranges. I thought this added some nice punch to the sunset.


You can also do this with the saturation tool in Photoshop or the GIMP--they allow you to select which color you are adjusting.

Finally, I brought the image into Photoshop and did some sharpening and noise reduction. I'm still not very familiar with either of these two techniques, but I got a little help from a video tutorial I watched of another photographer showing what he typically does with his landscape photos.

The changes were very impressive. The best way to show you would be for you to be sitting next to me looking at the image in Photoshop, but I was able to zoom in on some parts and take some snapshots that I think show the effects pretty well.

The first image in each series is the original, the second adds the sharpening, and the third adds the noise reduction.

I sharpened using the "Unsharp mask" with a radius of .8 and an amount of 200 (the tutorial suggested a radius of .8 with an amount between 170-220). This made the waves look a lot better, it was really cool.

You can see in the sky, though, that it also added a lot of noise there. I then used the "Reduce noise" tool with a strength of 7 and "preserve details" set to 40%. I didn't really know what I was doing here; I hadn't found any good tutorials, so I just played around a bit. You can see, though, that this brought the sky pretty much back to where it was without affecting the waves much.


I'll be sure and share more about sharpening and noise reduction as I learn it!