Friday, June 26, 2009

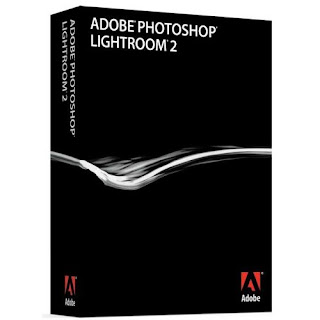
Adobe Lightroom 2

Lightroom is amazing.

Before purchasing Lightroom, I tried to learn what about it makes it so great. The answers I found were totally unsatisfying. Lightroom is generally described as a tool that "improves your whole workflow", from organizing to editing and publishing your photos. That's all true, but a statement like that doesn't tell you how it does any of those things.

After using it for a while, here's what I think makes it so amazing.

The main reason has got to be that it's actually designed for photography. As a result, it is far more intuitive to use than Photoshop, while still giving you most of the power of Photoshop.

The reason for this is that Photoshop is designed for more than just adding saturation and contrast. It's designed for photoshopping images. As someone described it on flickr, "You need Photoshop if you're going to paste in unicorns and rainbows"--you can't do that in Lightroom. Photoshop is for "compositing" images.

Lightroom also does some of the same things that you typically need Photoshop for, but with a much more intuitive interface. For example, one of the most important features of Photoshop over a simpler editor like Picasa is that it allows you to make adjustments to specific parts of an image. You can lighten someone's face, for example, or darken the background. You do this using layers and masks, and only Photoshop and the GIMP have support for layers and masks. While powerful, managing the layers and masks can be cumbersome, and it requires thinking of your image as a stack of layers, which isn't always intuitive.

Lightroom simplifies this with one of its coolest features, a tool called the adjustment brush. The adjustment brush allows you to literally paint an adjustment on to different parts of your image. This is a far more intuitive and manageable approach, and the interface they've created for it is brilliant. Take a look at this video tutorial on the brush, and I think you'll see why this is so exciting.


As for "improving your workflow", Lightroom has a very interesting approach to managing your photos that I really like. When you make adjustments to your photos in Lightroom, it does not actually make any changes to the original image. Instead, all of the adjustments you make to any of your photos are stored in a single database file. When you're ready to print or publish an image to the web, you export it and the adjustments are applied. This way, you don't end up with a bunch of copies of the same image--for example, the original image, your Photoshop or GIMP image which stores your edits, and the final image. Lightroom manages this for you, so you don't have to come up with some clever file naming and folder scheme to keep it all organized.

One of the greatest things you can say about Lightroom is that it costs less than half as much as Photoshop, and it may be all you need for Photography. With the power of the adjustment brush in Lightroom, there are far less things that you need Photoshop for. And if you ever do really need to do something in Photoshop, there's always the GIMP out there for free. I've also heard the argument that many of the features that you need Photoshop for, such as HDR, panorama stitching, and noise reduction, are done better by other smaller and cheaper pieces of independent software.

This video tutorial shows how Photoshop integrates with Lightroom, and in the process, he talks a bit about what you still use Photoshop for. The edit he does is pretty interesting--he uses the "warp" tool to basically slim down a model's hips. It's kind of scary to think that they can do that so easily!

If you're impressed by what you see of Lightroom, you should give it a try. Adobe offers a fully-functional 30-day trial of Lightroom on their website. Give it a spin and fall in love!

Saturday, June 20, 2009

Exciting New Toys

I'm afraid I've gone and done something that may make me less relatable.

For quite a while now, Jess and I have been using the desktop PC that we built for her in college six years ago. Because we built it ourselves, it's a bit of a Frankenstein, with different parts swapped out over the years. Anyway, it's time for a new one.

We wanted something with a more coherent look, so we were thinking about getting a Dell rather than building another PC. Jess was pushing for an iMac, though.

Here's how it broke down. The iMac is super compact, with no tower taking up floor space, and only one cord to plug in. It's also of course very elegant, which is really nice when you're doing artistic or design work--you want your "workspace" to inspire you.

Just weighing price and functionality, though, Macs don't make much sense. They are more expensive than an equivalent PC, while at the same they are less flexible, far more difficult and expensive to repair, and you can't carry components like the monitor forward to future computers. They also seem to be less efficient; compare the system requirements for a video game between a Mac and a PC--the Mac requires twice the horsepower.

In the end, though, I was won over by the elegance and form factor. Jess does a lot of design work, and we both do a lot of photography. We both wanted the work station to be gorgeous and exciting to work at, so we decided the price was worth it.


So we got the bottom-end 24" iMac. The main difference with the more expensive models seems to be the graphics card, which I've learned is not important for design work or photo editing. The most important factor is the amount of RAM, and all the iMacs come with 4GB.

We bought it refurbished, which cut $200 off the price and brought it down to $1299. The refurbished iMac is indistinguishable from the new one, the only drawback is you don't get the beautiful Apple packaging. I hear un-boxing a new Mac is something everyone should experience at least once.

The 24" screen is amazing. If you've used an editor like Photoshop, you know it covers your screen (and often the picture you're trying to work on) with a bunch of palettes. The wide screen is awesome because it affords plenty of room around the photo for all those sidebars.

So now I've estranged myself from my readers because I have a beautiful, fancy new computer that's inspiring to work at, and you're probably back where I was last month, editing on your 14" laptop. But wait, it gets worse.

Jess and I have made due without Photoshop for about four years now, since we started getting serious about photography. As Jess has started to do more design work and photography as well, we've gradually learned more about what we can do in Photoshop and the advantages it has over the GIMP. So... we decided to spring for it.

As you might imagine, I'm feeling mad with power at this point. The universe is pretty much mine to control. Who can stop me now that I wield Photoshop on a brand new iMac?

But have you looked at Photoshop CS4 on Amazon? It's a $700 program! It's an incredible tool, though, and if you know how to use it, it can be almost as crucial to your photography as your $1200 camera. So maybe that puts it more into perspective.

We've also heard people rant and rave about another Adobe program, which works in conjunction with Photoshop, called Adobe Lightroom 2. People will tell you this program revolutionizes photography, and we ended up throwing it in as well. I'm really excited to tell you about Lightroom, though I think it had better wait for another post.


So I feel that I've betrayed you all a bit. Up till now I've been, like many of us, relying on a smattering of free programs for editing, and jumping through hoops to accomplish things that can be done much more smoothly in Adobe's fine tools. Now, I'm sitting on some $2,500 worth of editing hardware and software, which makes more of what I do and share potentially inaccessible. I don't want that to be the case; it always frustrates me when other people share photography lessons with an attitude of "you're interested in photography, so of course you have Photoshop". Hopefully you won't find that here.

The reality is it's a lot to invest for someone still learning, and it makes sense to hold off on it for as long as you reasonably can. But don't let that stop you from taking great photos!

Thursday, June 18, 2009

Santa Barbara Fair


Back in April the Santa Barbara Fair was in town. I've seen a lot of cool photos of ferris wheels at night, so I was eager to go give it a try.

My family was also in town so we went and I brought my bag and tripod along. I was worried it would be pretty awkward walking around the fair with my camera bag and tripod, but you see, what I didn't realize, is that while I know that I'm just a floundering amature, no one at the fair knows that. In general people didn't seem to notice me, and if they did they probably just assumed I was super artsy and cool. I had a tripod and a shutter release, how could I not be?


A couple interesting things about shooting fairs at night.

I was happy to find that there's plenty of space around the rides to setup and photograph them. People are either in line, or walking through one of the main walkways, and there ends up being plenty of unused room for you to work in.

I was unhappy to find, though, that the lights on the rides are definitely not the only lights at a fair. The ferris wheel, in fact, was ruined by these big bright light poles surrounding and iluminating it. You couldn't take a shot of the wheel without getting one of those blinding white lights in it.


The photos were looking great on the back of the camera. Back on the computer, though, almost all of the photos were sadly out of focus (you can see this clearly in the first photo). I'm not sure what happened. My first thought was that I used too large of an aperture (f/3.5), resulting in too shallow of a depth of field. I probably should have tried a smaller aperture with a higher ISO to compensate; if nothing else, this would have given me more wiggle room in the focusing. The only problem with this theory, though, is that the above photo was taken at f/3.5 and came out just fine (it was the one exception). So it may have just been me failing to focus the lens properly, which is lame.

Better luck next time, I guess!